Are you thinking about installing a new heating and air conditioning system in your home? This is a big project, but don’t worry! We’ll explain everything in simple steps.
Installing an HVAC system (that’s short for heating, ventilation, and air conditioning) can cost between $3,500 to $7,000 if you hire someone. But some people do it themselves to save money. Let’s learn how it works!
Before You Start: Important Planning Steps
Understanding What You Need
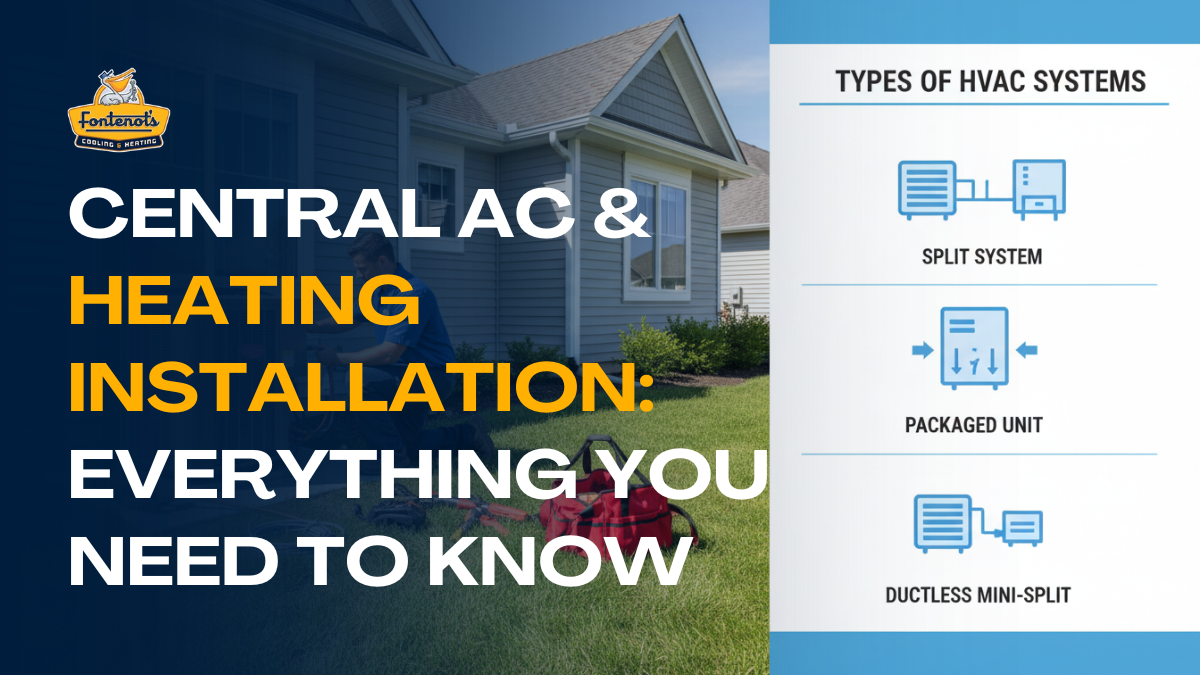
First, you need to know what type of system is right for your home. There are three main types:
Split Systems – This has two parts. One part goes outside your house, and one part goes inside. This is the most common type.
Packaged Units – Everything is in one big box. This usually sits on your roof or next to your house.
Ductless Mini-Splits – These are good if your home doesn’t have air ducts. They’re smaller and easier to install.
Getting the Right Size (Very Important!)
Here’s something many people get wrong: You can’t just guess what size system you need!
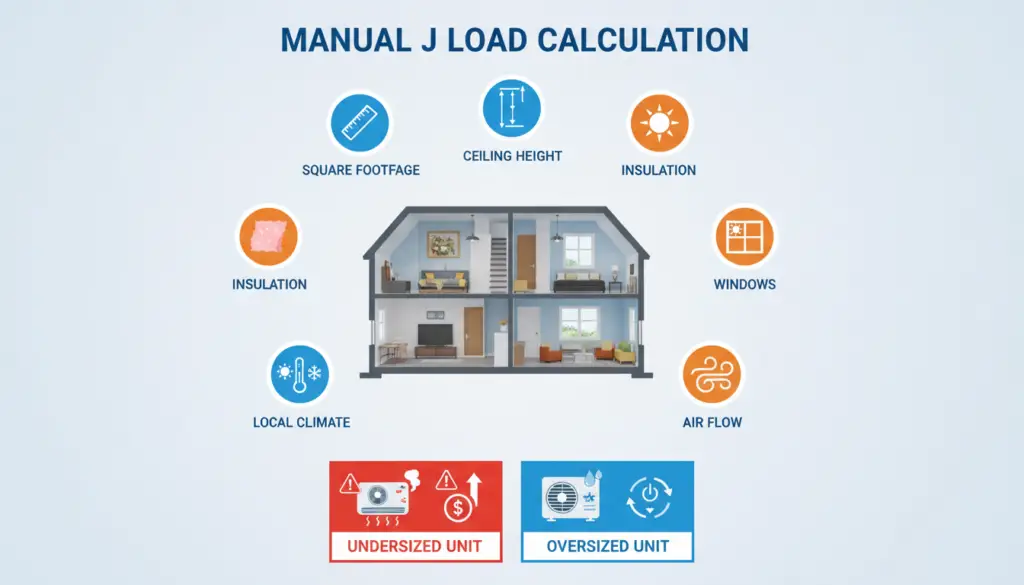
If your system is too small, it will run all day and night trying to cool or heat your home. Your electric bill will be huge!
If your system is too big, it will turn on and off too much. This wastes energy and won’t remove enough humidity from your air.
You need something called a “Manual J calculation.” This fancy name just means someone measures your home and figures out the perfect size. They look at:
- How big your home is
- How much insulation you have
- How tall your ceilings are
- How many windows you have
- What the weather is like where you live
A professional can do this for you, or you can find calculators online.
Picking Your Equipment
When you shop for heating and air conditioning systems, you’ll see something called a SEER rating. This tells you how much energy the system uses.
The law says your system must be at least SEER 13. But higher numbers are better! A SEER 18 system uses less electricity than a SEER 13 system. It costs more to buy, but you save money on your electric bill every month.
Getting Permission
Before you start work, you need permits from your city or town. This is like getting permission to build something.
You’ll usually need two permits:
- A mechanical permit (for the heating and cooling parts)
- An electrical permit (for the wiring)
Don’t skip this step! If you do, you might have to pay a fine or redo your work.
Should You Do It Yourself or Hire Someone?
This is a big question! Let’s look at both choices.
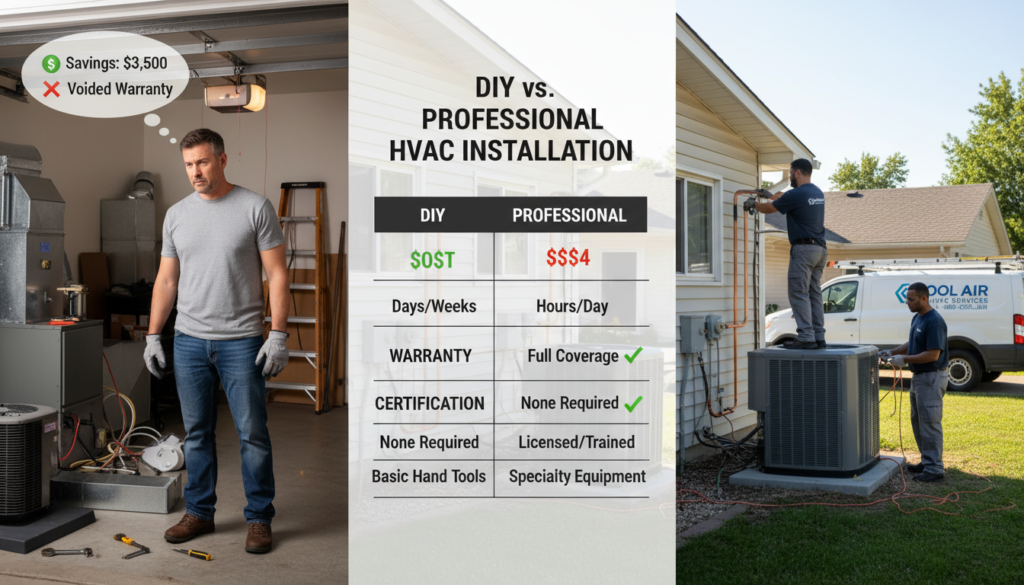
Why Hire a Professional
Good things about hiring someone:
- They know all the rules and codes
- Your warranty stays valid (if you mess up, the company won’t fix it for free)
- They have all the special tools
- If something goes wrong, it’s their problem, not yours
- They get the job done fast
The cost: Usually $3,500 to $7,000 for a basic system. Fancier systems can cost up to $25,000.
Why Do It Yourself
Good things about DIY:
- You can save thousands of dollars
- You learn new skills
- You can work on your own schedule
Problems with DIY:
- You need special certification to handle refrigerant (the stuff that makes cold air)
- You need to buy or rent expensive tools
- If you make a mistake, the warranty won’t cover it
- It takes a lot of time
- Some parts are really hard and dangerous
The Middle Way
Here’s a smart idea: You can do some parts yourself and hire a pro for the hard parts.
You can do:
- Set up the outdoor unit
- Do some of the electrical work (if you know how)
- Install the drain lines
Hire a pro for:
- Handling the refrigerant
- Brazing (a special kind of welding)
- Testing the system
- The final inspection
This way, you save some money but don’t risk messing up the hard parts.
Tools You’ll Need for DIY
If you want to do it yourself, you need these tools:
- Vacuum pump (sucks air and water out of the lines)
- Manifold gauges (measure pressure)
- Brazing torch (for connecting copper pipes)
- Nitrogen tank (keeps pipes clean during welding)
- Wrenches and screwdrivers
- Drill
- Level
These tools can cost $500 to $2,000. So think about this: if you only do one job, hiring someone might actually be cheaper!
Step-by-Step: How to Install Heating and Air Conditioning
Now let’s talk about how the actual work gets done. This is helpful even if you hire someone, so you know what they’re doing!
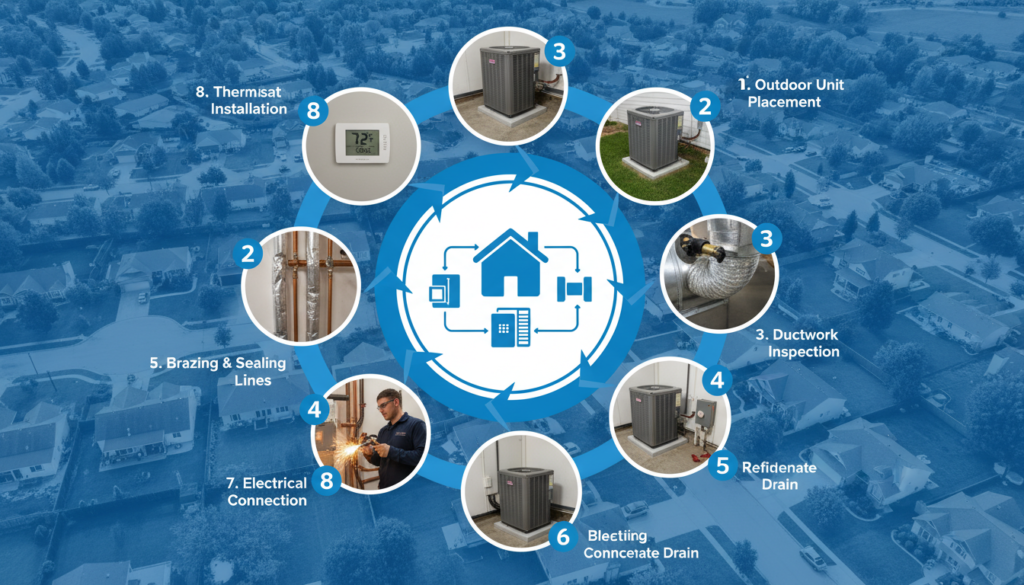
Step 1: Setting Up the Outdoor Unit
The big box that sits outside your house is called the condenser. Here’s how to set it up:
Pick the right spot:
- It needs to be at least 2 feet away from your wall
- Keep it away from bushes and plants (it needs airflow)
- Don’t put it where snow will pile up on it
- Keep it away from your bedroom window (it makes noise)
Make a flat base:
- You need a special pad to sit it on
- Use a composite pad, not concrete (it’s better because it doesn’t crack)
- Make sure it’s perfectly level (use a level tool to check)
Why this matters: If the unit isn’t level, the oil inside won’t flow right and the machine can break.
Step 2: Setting Up the Indoor Unit
The indoor part (called the evaporator or air handler) usually goes in your basement, attic, or closet.
Things to check:
- It needs to fit with your furnace (if you have one)
- Sometimes you need to make metal pieces to connect everything
- It needs to be close to a drain
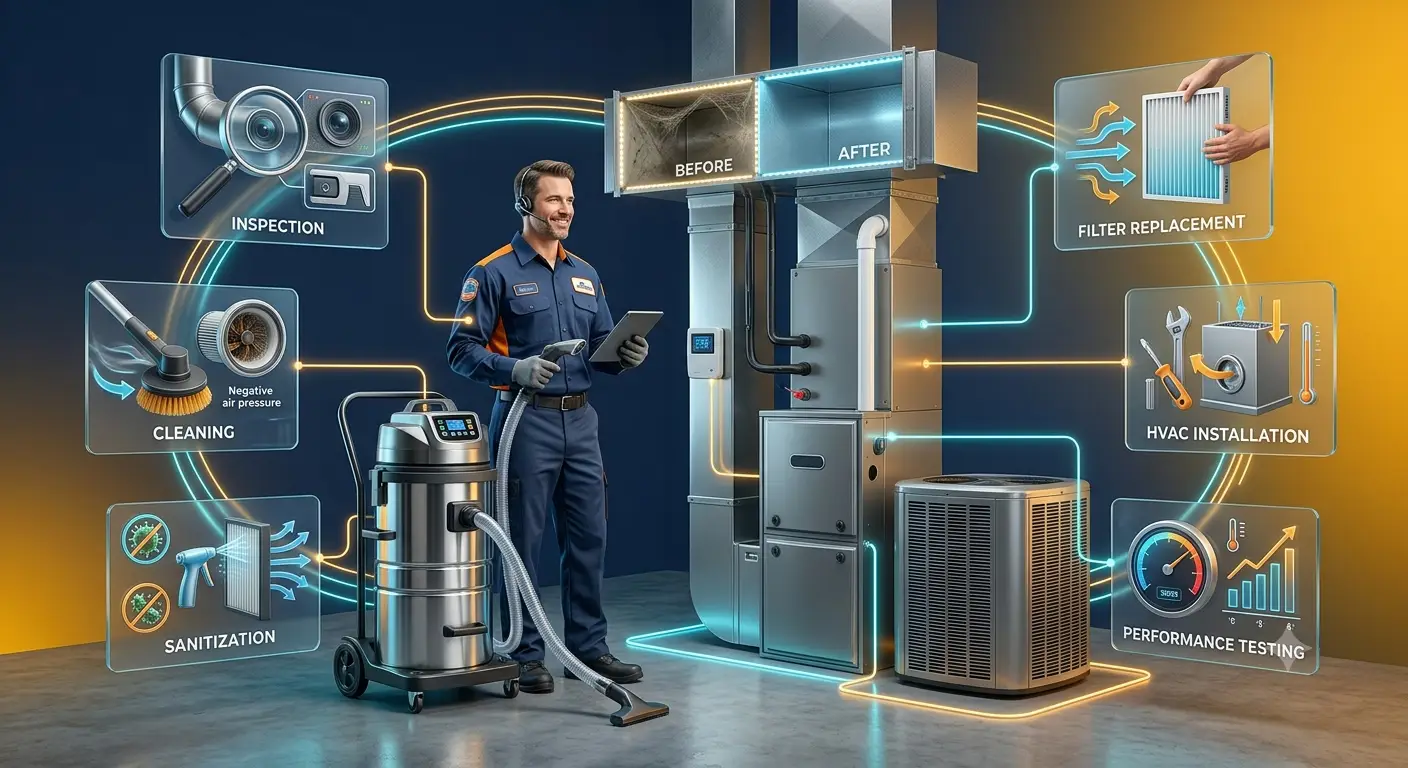
Step 3: Checking Your Air Ducts
If you already have ducts in your home, check them carefully.
Look for:
- Holes or cracks (these waste energy)
- Ducts that are too small
- Ducts that aren’t connected well
If your ducts have problems, seal them with special metal tape (not regular duct tape – that doesn’t last). You might need to add insulation around them too.
Step 4: Running the Refrigerant Lines
This is one of the tricky parts. Refrigerant is the special liquid that makes cold air. It travels through copper pipes between your indoor and outdoor units.
Here’s what happens:
- Two copper pipes connect the indoor and outdoor units
- These pipes need to be the right size
- They need insulation around them (so they don’t sweat and drip water)
- They can go through walls or under your house
Important: Don’t bend the pipes too much or they’ll break!
Step 5: Connecting the Pipes (Brazing)
This part is hard and dangerous. You need to weld the copper pipes together. This is called brazing.
Why it’s tricky:
- You use a very hot torch
- You need to flow nitrogen gas through the pipes while you work (this keeps them clean inside)
- If you do it wrong, the connection will leak
- You need to add a filter dryer (this removes water from the system)
Safety warning: If you’ve never used a torch before, this is a good part to hire someone for!
Step 6: Electrical Work
Your system needs electricity to run. Here’s what you need to do:
Outside:
- Install a disconnect box (this is a switch that turns off power)
- This is a safety thing – if something goes wrong, you can turn it off fast
- Run wires from your electrical panel to this box
Inside:
- Connect wires to your air handler
- Install your thermostat on the wall
- Connect the thermostat wires
Important: If you’re not comfortable with electrical work, hire an electrician. Getting shocked is no fun!
Step 7: Installing the Drain Line
Your air conditioner makes water (from humidity in the air). This water needs somewhere to go.
Setting up drainage:
- Install a PVC pipe from your indoor unit
- This pipe needs to slope down (water won’t flow uphill!)
- Connect it to a floor drain or outside
If you don’t have a floor drain:
- You need a condensate pump
- This small pump pushes the water outside
- It plugs into electricity
Step 8: Venting (If You Have a Furnace)
If you’re installing heating too, your furnace needs to get rid of exhaust.
Old furnaces: Used a metal chimney
New high-efficiency furnaces:
- Use PVC pipes instead
- One pipe brings in fresh air
- One pipe lets out exhaust
- These pipes go out the side of your house, not up through the roof
Testing Your New System
You can’t just turn it on and hope it works! You need to test everything carefully.
Step 1: Pull a Vacuum
This sounds weird, but you need to suck all the air and moisture out of the refrigerant lines.
Why? Water and air will damage your system. They need to be removed completely.
How long? You run the vacuum pump for at least 30 minutes. Some people do it for hours to be extra safe.
Step 2: Pressure Test
After the vacuum, you test for leaks.
- Add some pressure to the lines
- Wait a few hours
- If the pressure drops, you have a leak
If there’s a leak, you need to find it and fix it before you go further.
Step 3: Add Refrigerant
This is why you need EPA certification. It’s illegal to buy or handle refrigerant without this special license.
A professional will:
- Open the valves on your outdoor unit
- Check the pressure and temperature
- Add more refrigerant if needed
- Make sure everything is just right
Step 4: Test the Airflow
Turn on your system and check:
- Is cold air coming out of all your vents?
- Is the airflow strong enough?
- Is one room getting too much air and another not enough?
You might need to adjust little dampers in your ducts to balance everything.
Step 5: Set Up Your Thermostat
Your thermostat is the brain of your system.
Test all the modes:
- Heating
- Cooling
- Fan only
- Auto (switches between heating and cooling)
Make sure it turns on and off when it should.
Mistakes People Make (And How to Avoid Them)
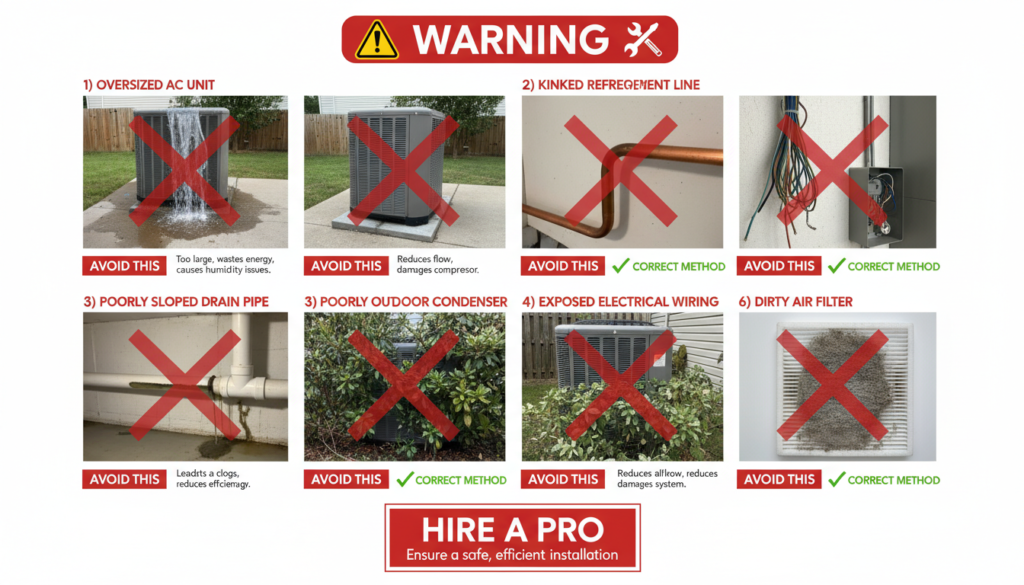
Let’s talk about the most common problems:
Mistake 1: Wrong Size System
This is the biggest mistake! Always get a proper calculation done. Don’t guess!
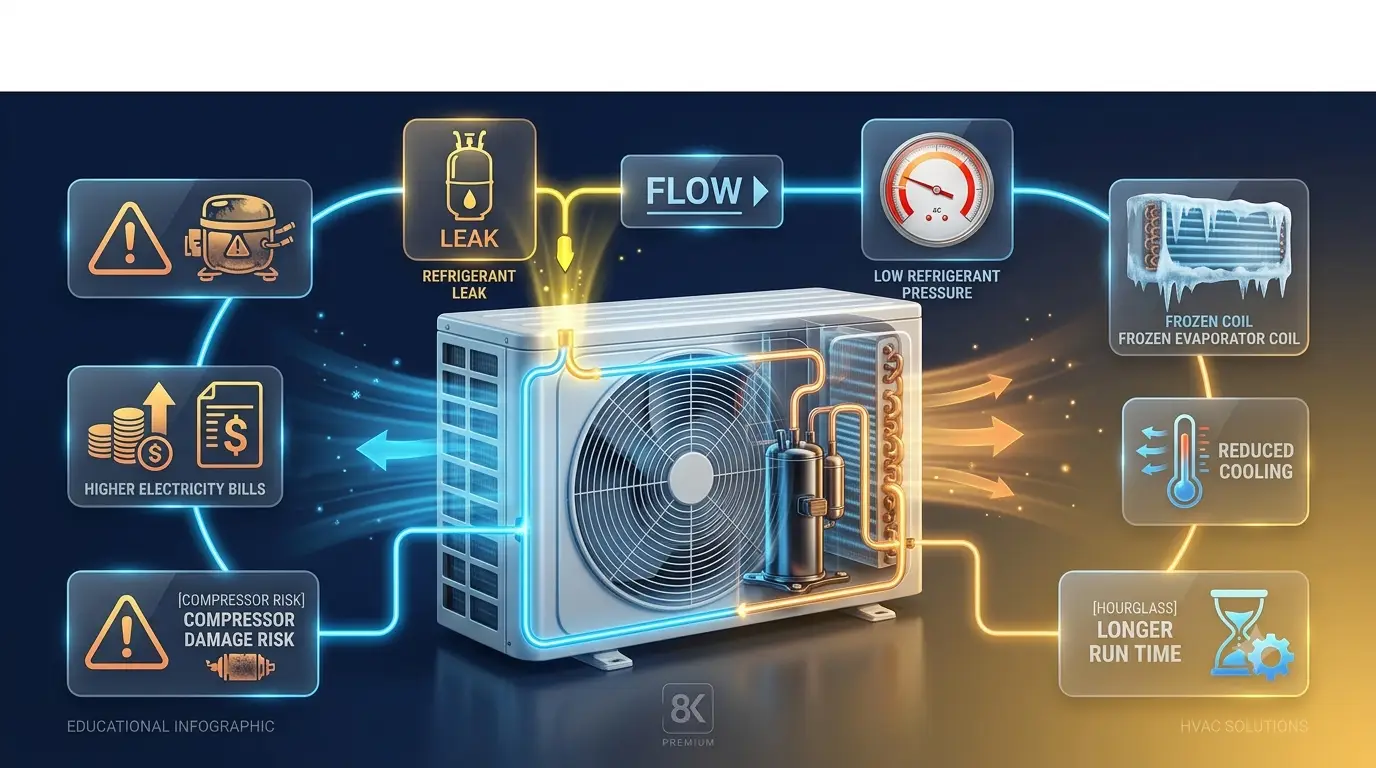
Mistake 2: Bad Refrigerant Work
If the refrigerant lines leak or aren’t installed right, your system won’t work. It might break after just a few months.
Mistake 3: Forgetting the Vacuum
Some people skip pulling a vacuum because it takes time. Don’t do this! The moisture left in the lines will destroy your compressor.
Mistake 4: Poor Drainage
If your drain line doesn’t slope enough, water will back up and overflow. This can damage your ceiling or walls.
Mistake 5: Electrical Mistakes
Using the wrong size wire or breaker can cause fires. Always follow the electrical codes!
Mistake 6: Bad Airflow
If you don’t balance your system, some rooms will be hot and others cold. Your family won’t be happy!
How Much Does It Cost?
Let’s talk about money!
Hiring a Professional
Basic central air conditioning:
- Equipment and installation: $3,500 to $7,000
- This includes everything (labor, materials, permits)
- Can cost up to $25,000
- These do both heating and cooling
- They’re more complex
What affects the price:
- Size of your home
- Type of system
- How hard the installation is
- Where you live
- Time of year
Doing It Yourself
Equipment only:
- Basic system: $3,000 to $4,000
- You can buy online or from supply stores
Tools and supplies:
- If you don’t have tools: $500 to $2,000
- Permits: $100 to $500
- Random supplies (copper pipe, wire, etc.): $200 to $500
Total DIY cost: Around $4,000 to $6,000
Your savings: Maybe $1,000 to $3,000 (but you do all the work and take all the risk)
Ways to Save Money
Best time to install:
- Spring or fall (companies are less busy)
- Avoid summer (that’s when everyone wants AC!)
Look for deals:
- Rebates from your power company
- Tax credits from the government
- Manufacturer promotions
- Talk to at least 3 different companies
- Compare prices and what’s included
- Don’t always pick the cheapest (quality matters!)
Taking Care of Your System
Once your heating and air conditioning is installed, you need to take care of it!
Things You Should Do Every Month
Change the filter:
- Most systems need a new filter every 1-3 months
- This is the most important thing you can do
- Dirty filters make your system work harder
Check the drain:
- Make sure water is draining properly
- Pour a cup of vinegar down the drain to keep it clean
Things to Do Every Year
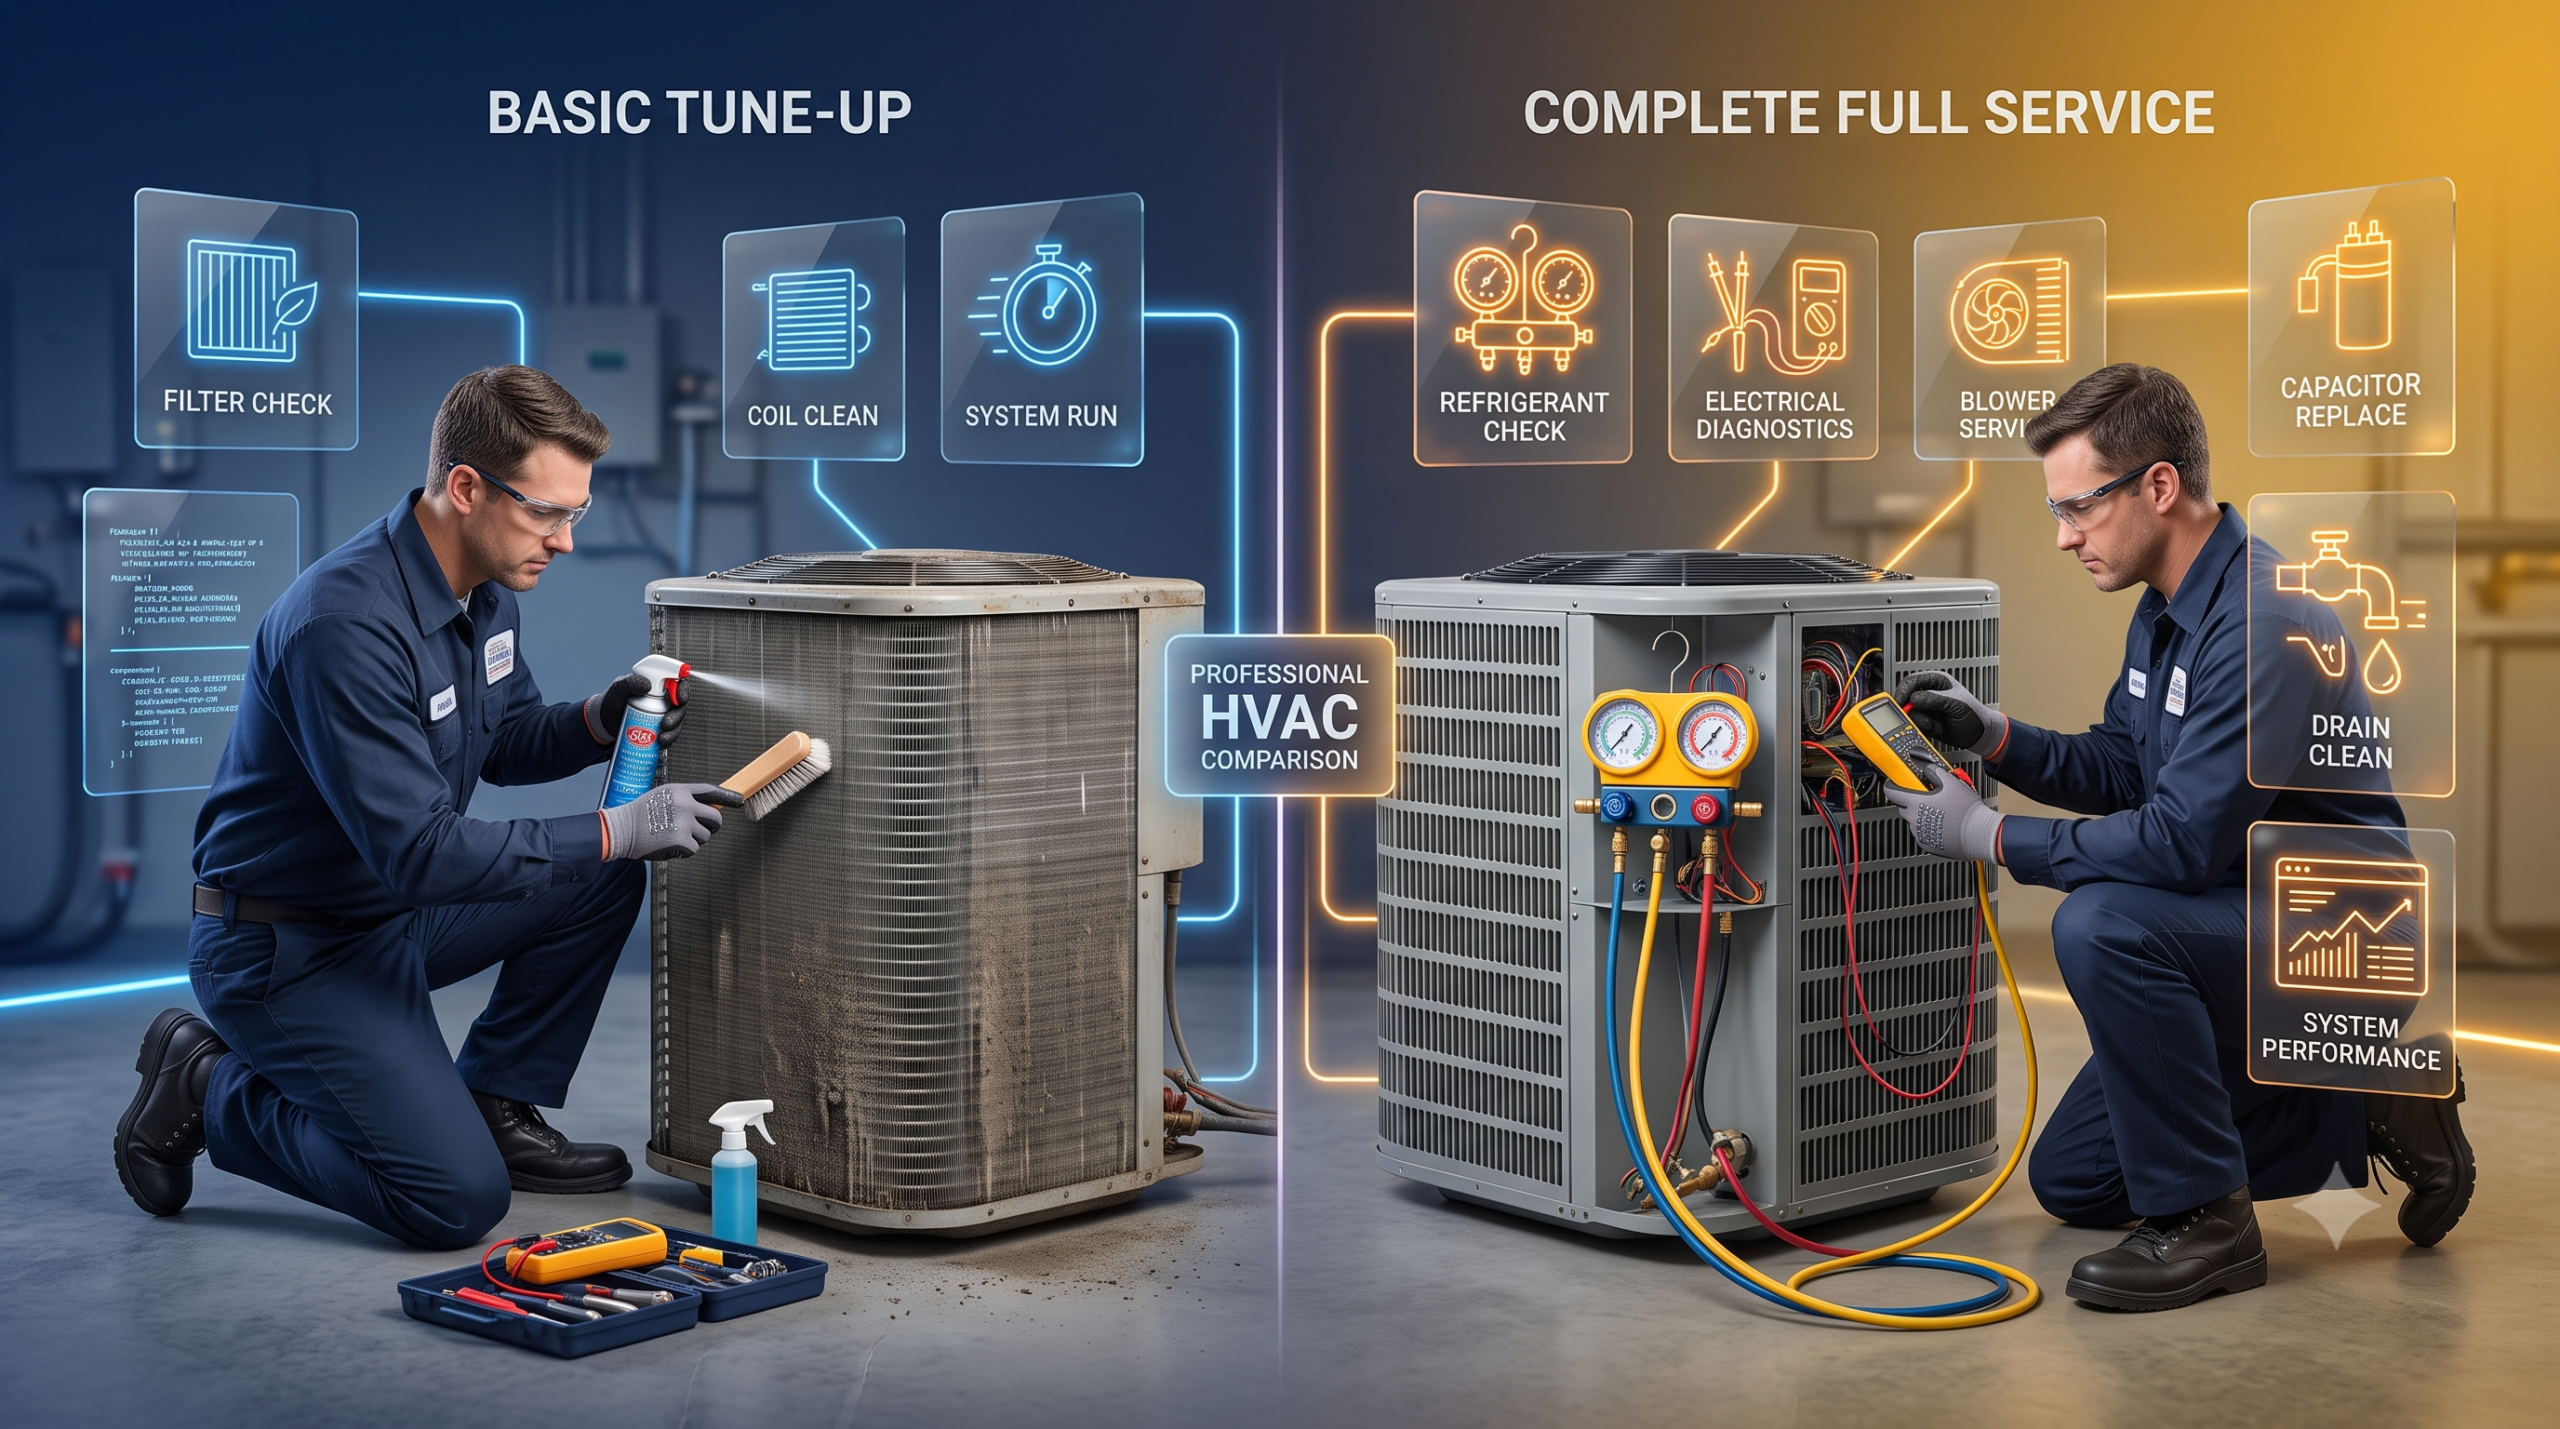
Hire a professional for a tune-up:
- They’ll clean everything
- Check refrigerant levels
- Tighten electrical connections
- Spot problems before they get big
Clean the outdoor unit:
- Turn off the power
- Spray it gently with a hose
- Remove leaves and debris
Check your ducts:
- Look for new holes or loose connections
- Make sure insulation is still good
Seasonal Tasks
Before summer:
- Test your AC early (don’t wait for the first hot day!)
- Trim bushes around the outdoor unit
Before winter:
- Cover your outdoor unit (some people do this, some don’t)
- Check your furnace filter
- Test your heating
Frequently Asked Questions
Can I install my own HVAC system?
Technically yes, but it’s hard. You can do some parts yourself, but you need EPA certification to handle refrigerant. Many people do a mix – they handle the physical setup and hire a pro for the technical parts.
Do I need a permit to install HVAC?
Yes! Almost every city and town requires permits for heating and air conditioning work. You need a mechanical permit and usually an electrical permit too. Don’t skip this step.
How much does it cost to install central air conditioning?
If you hire a professional, expect to pay $3,500 to $7,000 for a basic system. Larger homes or fancy systems cost more. DIY can save you money but comes with risks.
What is Manual J load calculation?
This is a way to figure out exactly what size system your home needs. It looks at your home’s size, insulation, windows, and local weather. Getting this right is super important!
Do I need EPA certification to install HVAC?
You need EPA 608 certification to handle refrigerant. You can’t legally buy refrigerant without it. You also can’t release old refrigerant into the air – that’s illegal and bad for the environment.
What SEER rating should I choose?
The law requires at least SEER 13. Higher is better for saving energy. SEER 16-18 systems cost more upfront but save money on electricity. Think about how long you’ll live in your home when deciding.
How long does HVAC installation take?
A professional team usually takes 1-2 days for a basic system. Complicated jobs might take 3-5 days. DIY takes longer – maybe a week or more if you’re learning as you go.
What tools do I need for HVAC installation?
The main tools are a vacuum pump, manifold gauges, brazing torch, and nitrogen tank. You also need regular tools like drills and wrenches. Buying all these tools can cost $500 to $2,000.
Will DIY installation void my warranty?
Most manufacturers require professional installation to keep your warranty. If you install it yourself and something breaks, they won’t fix it for free. Check your warranty before you decide.
What’s the difference between SEER and AFUE ratings?
SEER measures air conditioning efficiency. AFUE measures furnace efficiency. Higher numbers are better for both. Think of them like miles-per-gallon for your car – they tell you how much energy you’re wasting.
Final Thoughts
Learning how to install heating and air conditioning is valuable, even if you hire someone to do it. When you understand the process, you can:
- Ask better questions
- Spot if someone is doing bad work
- Make smart choices about your home
- Save money by doing some parts yourself
Remember these key points:
Get the size right – This is the most important thing. A wrong-sized system will cost you money and comfort for years.
Don’t skip the technical parts – Refrigerant work and electrical work can be dangerous. If you’re not confident, hire a pro.
Get permits – Yes, it’s annoying and costs money, but it’s the law. Plus, it protects you.
Take your time – Rushing leads to mistakes. Whether you’re doing it yourself or watching a contractor, make sure every step is done right.
Maintain your system – A $2 filter every month is way cheaper than a $5,000 repair!
Installing a new heating and air conditioning system is a big project, but it makes your home comfortable all year long. Take your time, do your research, and don’t be afraid to ask for help when you need it.