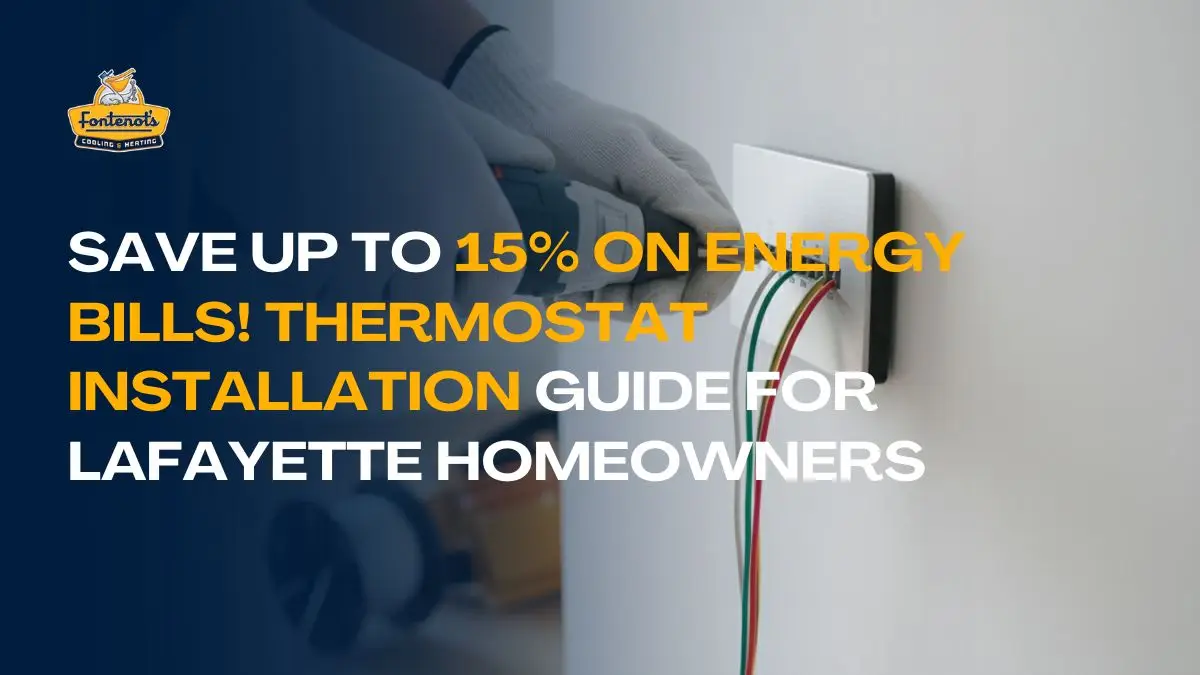
Installing a new thermostat for your central heating system is a project that almost anyone can handle themselves. This task is considered beginner-level and usually takes about 30 minutes to an hour or less to complete. You do not need special electrical or plumbing experience to replace your old unit. By upgrading to a modern programmable or smart thermostat, you can reduce your heating and cooling bills by up to 15 percent because these units manage temperature automatically.
Before starting, it helps to know the main types of thermostats available:
- Non-Programmable: These are simple to adjust but are best if you are home most of the time.
- Programmable: These allow you to set schedules for different times of the day and week.
- Wi-Fi: These units let you change the temperature using a smartphone from anywhere with an internet connection.
- Smart/Learning: These advanced units learn your family’s habits and can be controlled remotely.
II. Pre-Installation Check: Safety and Compatibility
Before touching any wires, you must make sure you have the right tools and understand the essential safety steps.
A. Required Tools and Materials
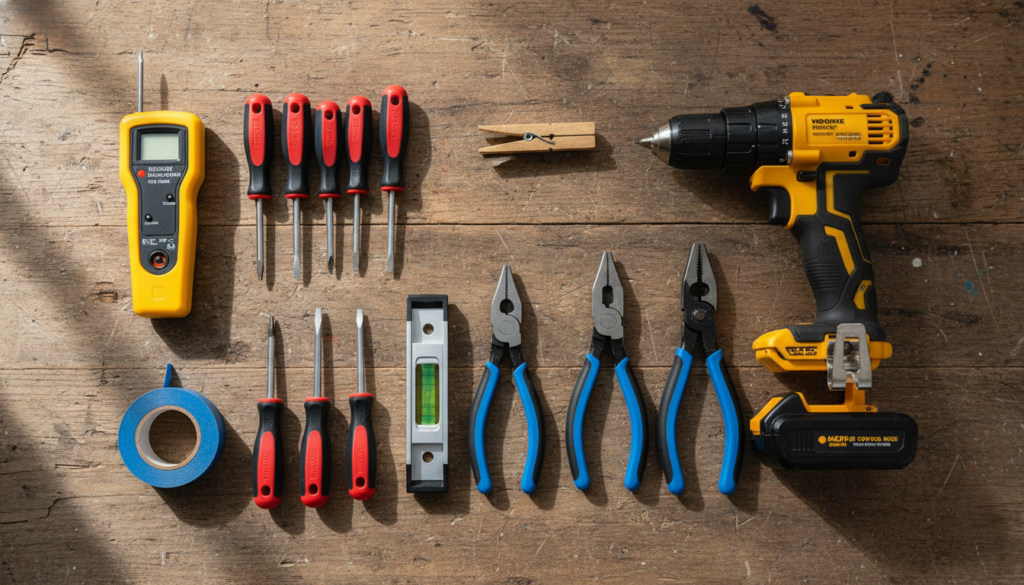
Gathering your tools beforehand will make the installation process go smoothly. Essential tools include screwdrivers, a drill, a level, and a wire stripper. You will also need some specialized safety and securing tools:
- Essential Safety Tool: A Non-Contact Circuit Tester or a High-Voltage Neon Circuit Tester is necessary.
- Wire Securing Tool: Have a clothespin, a pencil with a rubber band, or vice grip pliers ready to hold the wires.
- DIY Hack: Use blue painter’s tape if you need to drill new holes, as it can help catch the dust.
B. The Essential Safety Step (MUST Be First)
This safety step is the most important part of the entire installation process.
- Turn Off Power: You must locate your main electrical panel or fuse box and turn off the power to your HVAC system or central heating unit. For complete safety, some people choose to turn off the power to the whole house.
- Verify Power is Off: After turning the breaker off, use a circuit tester on the wires to confirm they are “dead” before you touch them. If your old thermostat had a digital screen, it should be blank once the power is successfully shut off.
C. Compatibility and Voltage Check
It is vital to confirm that your new thermostat is safe and compatible with your existing system.
- System Compatibility: Make sure the new unit works with your type of heating system, such as forced air, a heat pump, or forced hot water. The new thermostat must not draw more voltage than your current circuit, as this situation creates a fire hazard.
- Advanced Voltage Verification (Expert Tip): If you are concerned about having an incompatible system, such as a high-voltage system or a millivolt system, you should check the voltage before disconnecting the wires. Using a multimeter, test the voltage between the R and W wires (or R and C) while the power is on. If the reading confirms a low-voltage system, it should read about 24V. If your meter shows a reading of 110 VAC or higher, you must NOT proceed with the installation yourself, as these systems require professional handling.
III. Step 1: Remove the Old Unit and Secure the Wires
Once the power is confirmed off, you can safely remove the old thermostat.

- Remove the Cover: Gently take off the old thermostat body or cover by tilting it or unsnapping it from the base plate.
- Document Existing Wiring: This is a crucial step for preventing mistakes. You must take a high-resolution photograph of the wires showing which wire is connected to which terminal. This photo will be your backup reference for connecting the new unit.
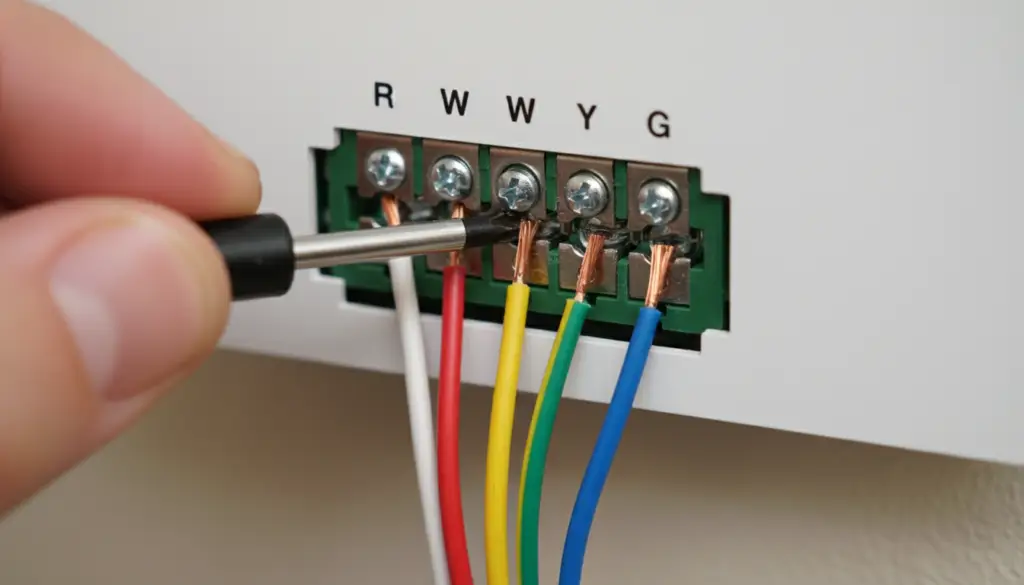
- Label the Wires: Use masking tape or the stickers provided with the new kit to label each wire with its corresponding letter designation or terminal code (such as R, W, Y, G, or C). It is critical to ignore the wire color. The letter code is the only information that matters for correct installation.
- Disconnect Wires and Base Plate: Loosen the small screws on the terminals to free the wires, and then remove the screws that hold the old wall plate to the wall.
- Secure the Wires: Be very careful to secure the loose wires so they do not fall back into the hole in the wall. If they fall into the wall, retrieving them can become a difficult and time-consuming task. You can use a clothespin, tape the wires to the wall, or use a pencil wrapped with a rubber band to hold the wires outside the wall. Vice grip pliers also work well for securing the bundle of wires.
- Mercury Disposal: If your old unit is very old, it might contain a small glass tube filled with mercury. You must handle it carefully to ensure the tube does not break. Mercury is hazardous, so you must take the old unit to a hazardous waste disposal site following your local authority’s guidelines.
IV. Step 2: Mounting the New Plate and Achieving a Clean Finish
With the old unit removed, the next step is to prepare the wall for the new base plate.
- Cosmetic Preparation: If the paint has stuck to the edges of the old base plate, use a utility blade to score or cut the paint around the perimeter before prying the plate off. This step helps prevent the surrounding wall paint from tearing when you remove the plate, leading to large areas of wall damage.
- Wall Coverage: Look at the size of the new wall plate and decide if it will cover the old screw holes and marks. If the new plate is too small, you can use a trim plate if one was included in your kit. If the marks are severe, you may need to repair the wall.
- Patching: If you are not using a trim plate and need a flawless wall, remove any old drywall anchors. Patch the existing holes or cracks using joint compound and allow it enough time to dry completely before you continue the installation.
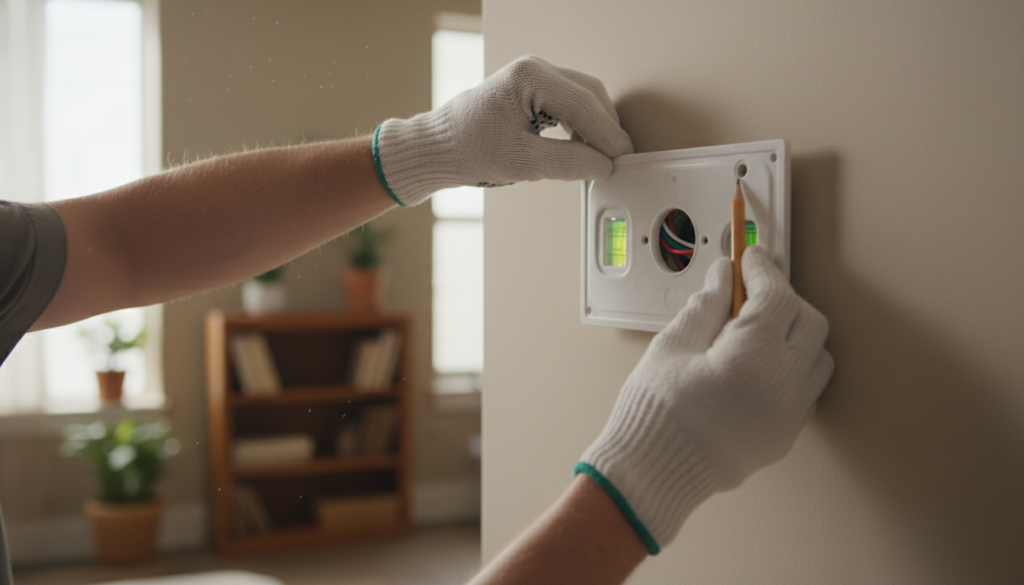
- Position and Level: Pull the wires through the opening in the new base plate. Place the plate against the wall and use a level to make sure the plate is perfectly straight. Mark the spots where you will drill the new screw holes.
- Secure the Plate: Drill pilot holes for the new screws. If you are drilling into drywall, insert the appropriate plastic wall anchors that came with your thermostat kit. Finally, screw the new mounting plate securely to the wall.
V. Step 3: Wire Connections and C-Wire Setup
This is the step where you bring your new thermostat to life by connecting the wires.
- Wire Preparation: Inspect the exposed copper ends of your system wires. If they look damaged or if the exposed copper ends are too short to reach the new terminals securely, use a wire stripper. Carefully remove just enough of the wire insulation so that the bare copper metal can touch the terminal without any extra exposed copper touching the nearby terminals. This prevents short circuits.
- Connect Wires: Match the wire labels you created to the correct terminals on the new mounting plate. For example, the wire labeled ‘R’ goes to the ‘R’ terminal, ‘W’ goes to ‘W’, and so on.
- Secure Terminals: Insert the wire end into the terminal slot and tighten the terminal screws. Make sure the screws are tight (righty-tighty) until the wire is snug and cannot be pulled out easily. Note that some newer thermostats might use push-down buttons to secure the wires instead of screws.
- Jumpers: Check the instruction manual for information about any metal jumper. This jumper might connect terminals like R and RC. The instructions will tell you if you need to remove the jumper or keep it in place for your specific system.
- C-Wire (Smart Thermostats): If you are installing a Wi-Fi or Smart thermostat, it usually needs a C (Common) wire. This wire provides constant, low-voltage power for features like Wi-Fi and the screen. If you do not have a C-wire in the wall bundle, you must consult your manual for alternative power accessories. You might also need to arrange for a professional smart thermostat installation to run a new C-wire. Let Fontenot’s experts handle your smart thermostat installation
- Mount the Unit: Once all the wires are connected, install any disposable batteries that your unit requires. Carefully snap the thermostat body onto the wall plate. Ensure that the pins and connections on the back of the unit line up correctly with the plate.
VI. Step 4: Power-Up, Configuration, and Programming
You are now ready to turn on the power and set up your new system.
- Restore Power: Go back to the breaker panel and turn the power back on to your heating system.
- Initial Setup: The new thermostat screen should turn on. Follow the manufacturer’s instructions on the screen to set the display language, the current time, and the temperature format (Fahrenheit or Celsius).
- Specify Equipment Type: It is very important that you configure the thermostat correctly to identify your type of heating system. You must choose whether you have a Gas or Oil Furnace, an Electric Furnace, or a Heat Pump.
- Heat Pump Configuration: If you have a heat pump system, you must make sure to designate the O or B wire. This wire controls the reversing valve, which allows the system to switch properly between the heating and cooling functions.
- Advanced Systems: If your system includes multi-stage heating or cooling (meaning your system has two or more speeds), or if you have specialized wires for extra equipment like humidifiers or ventilators, you should check the connections through the thermostat’s app or manual. If you are not completely sure about setting up these advanced features, you should contact a professional to avoid damaging your equipment.
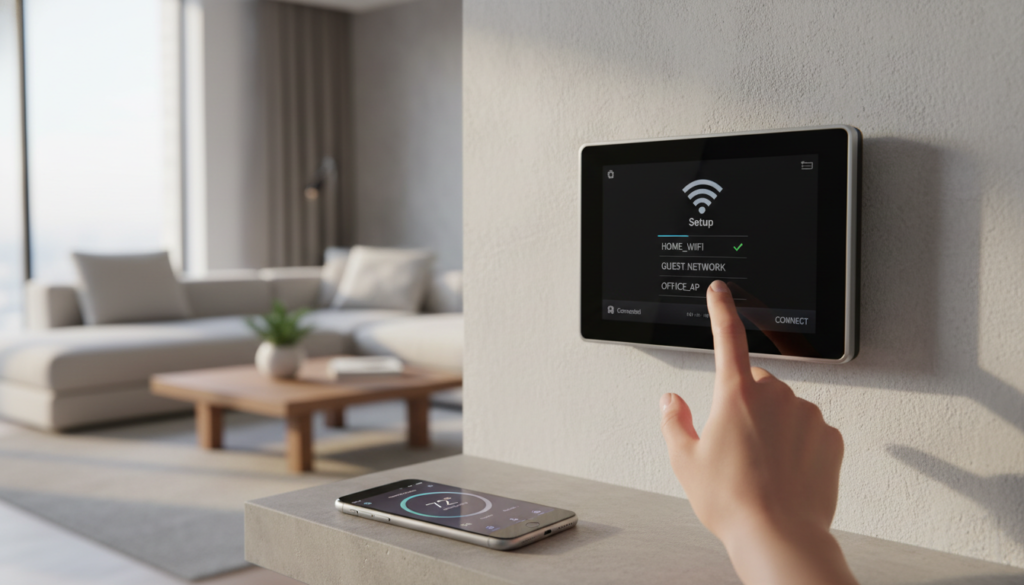
- Smart Features/Scheduling: The final step is to connect your unit to your Wi-Fi network. Download the required mobile app and set up your temperature schedules. Establishing basic schedules is key to maximizing energy savings.
VII. Troubleshooting and Maintenance
Even after successful installation, you might run into small issues or need advice on keeping the unit working well.
A. Common Issues and Solutions
- System Not Turning Off or Running Constantly (Wired Units): The first thing to check is that the wires are securely fastened to the terminals. Ensure they were tightened correctly (righty-tighty). Next, check the configuration menu to verify that the system type (Gas or Electric) is set up correctly. If the problem continues, you may need to inspect the wire connections at the furnace or air handler control board. Need emergency HVAC repair in Lafayette, LA? Contact Fontenot’s 24/7
- Connection Problems (Wireless/Smart Units): Check that both the thermostat unit and any remote receiver are powered on. Make sure they are within the wireless range specified by the manufacturer. If there is interference from other electronics, you may need to move the unit slightly.
- Inaccurate Temperature Readings: To get accurate readings, your thermostat must be placed on an interior wall. Make sure it is away from places that could affect the temperature reading, such as drafts, direct sunlight, or heat-producing appliances.
B. Ongoing Maintenance
Taking simple steps will ensure your new thermostat lasts for a long time.
- Regular Checks: Clean the unit gently using a soft, dry cloth. Check the connections on any external receivers and replace disposable batteries as often as the manufacturer recommends.
- Software Updates: For smart thermostats, make sure you enable automatic software updates. You should also check the mobile app regularly to ensure the thermostat is running efficiently and securely with the latest features.
VIII. When to Call a Professional (Crucial Warnings)
While installing a thermostat is a great DIY job, there are times when you must stop and call a trained expert. Do not attempt installation and call a licensed electrician or Gas Safe Registered Engineer if you see or suspect any of these situations:
- High-Voltage Systems: If the wall wires are two or four thick wires or if the old thermostat label says 110 VAC or higher, you are dealing with high voltage.
- Millivolt Systems: These systems are typically found with space heaters or floor heaters and do not have enough power to run a modern digital thermostat.
- Stranded Wires: If the wall wires are not solid pieces of metal but are made up of very thin wire strands, contact an electrician to update your wiring.
- Boiler or Gas Systems: If you feel uncertain about how to wire a zone valve or transformer on a gas or boiler system, seek professional help to ensure safety.
- Proprietary Wiring: If the way your wires are set up looks completely different from the standard arrangement shown in the manuals, it might be a proprietary system.