

When you pay to heat or cool your home, you expect that air to end up in your living rooms. But in many homes, a lot of that expensive air escapes before it even leaves your basement, attic, or crawl space. Learning how to seal ductwork is one of the most important projects you can do for your house. This guide will walk you through the process, from finding the leaks to finishing the job like a professional.
Why Duct Sealing is the Most Crucial Home Upgrade
Sealing the air ducts in your home is not just a small fix; it is one of the biggest steps you can take to make your house more comfortable and save money right away.
The High Cost of Leakage
If you have a forced-air heating and cooling system, the air moves through metal or flexible ducts that run throughout your house. Unfortunately, these systems often have leaks.
The problem is that a typical home loses 20% to 30% of conditioned air through holes, leaks, and poor connections in the duct system. According to the U.S. Department of Energy, this “conditioned air” is the air you have paid money to heat in the winter or cool in the summer.
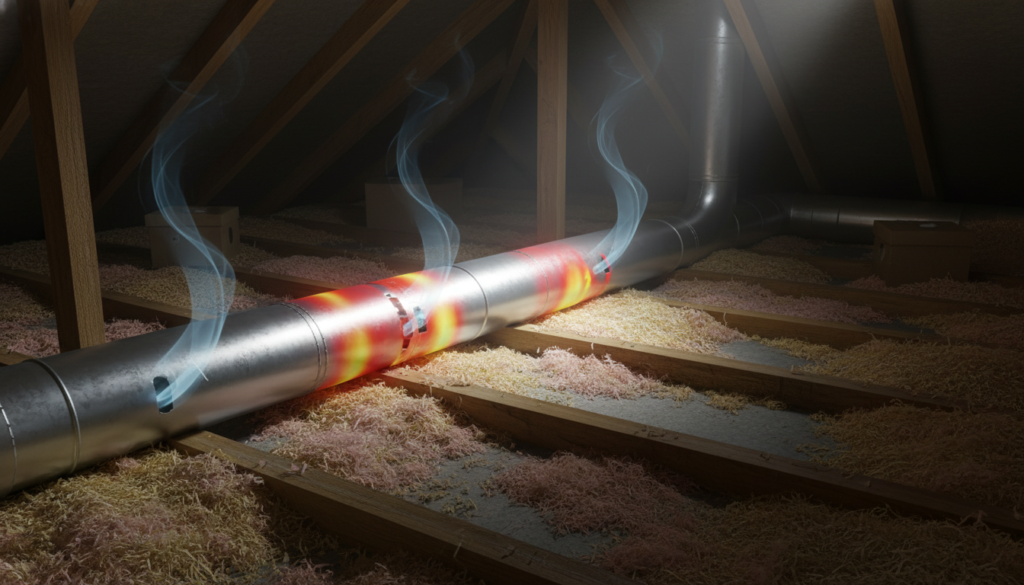
When you lose 20% to 30% of your treated air, it means that roughly 25 cents of every dollar you spend on heating and cooling is wasted. This lost air escapes into unconditioned spaces, like the attic or crawl space, where it does you no good at all.
Core Benefits of a Sealed System
Stopping these leaks provides immediate and long-term rewards for you and your home:
- Energy Savings: When your ducts are sealed, your heating and cooling system does not have to work as hard to keep your home at the right temperature. This reduces the stress on the entire HVAC unit, which lowers your utility bills and makes the system run more efficiently.
- Enhanced Comfort: Leaks often cause a house to have “hot and cold spots.” If one room is freezing while another is warm, uneven temperatures are likely the result of leaky ducts. Sealing these leaks helps send the right amount of air to every room, giving you stable comfort throughout the whole house.
- Improved Indoor Air Quality (IAQ): When ducts leak, they do not just lose air; they also suck in air from the spaces they pass through. This means they draw in things like dust, debris, mold spores, and even insulation fibers from dirty areas like attics or crawlspaces. EPA recommends sealing ducts to prevents these contaminants from entering your air supply and circulating through your home, making the air you breathe much cleaner.
- Safety: Duct sealing is also important for safety. It minimizes the risk of back-drafting. Back-drafting is when harmful, toxic combustion gases, such as carbon monoxide, from appliances like gas water heaters or furnaces are pulled backward into your living space instead of being safely vented outside.
Need a professional duct leakage test in Lafayette? Fontenot’s Air Conditioning and Heating offers comprehensive duct diagnostics with Duct Blaster testing. Contact us today for a thorough assessment.
Preparation and Leak Detection (The Crucial First Steps)
You cannot seal a leak until you find it. Before you apply any sealant, you must first inspect your ductwork thoroughly and then prepare the surfaces.
Initial Inspection (DIY Methods)
For areas you can easily access, you can find leaks yourself . You should check all visible joints, seams, and connections for clear holes or gaps . These connection points are the most common places for air to escape .
Here are a few ways to find leaks using simple tools:
- Flashlight Scan: Use a flashlight to carefully scan along the runs of the ductwork. Look for separation or large cracks at the seams .
- Wet Hand Test: Slightly wet your hand . Run your damp hand along the duct seams while the HVAC system’s fan is running . Your hand is more sensitive to feeling the escaping air .
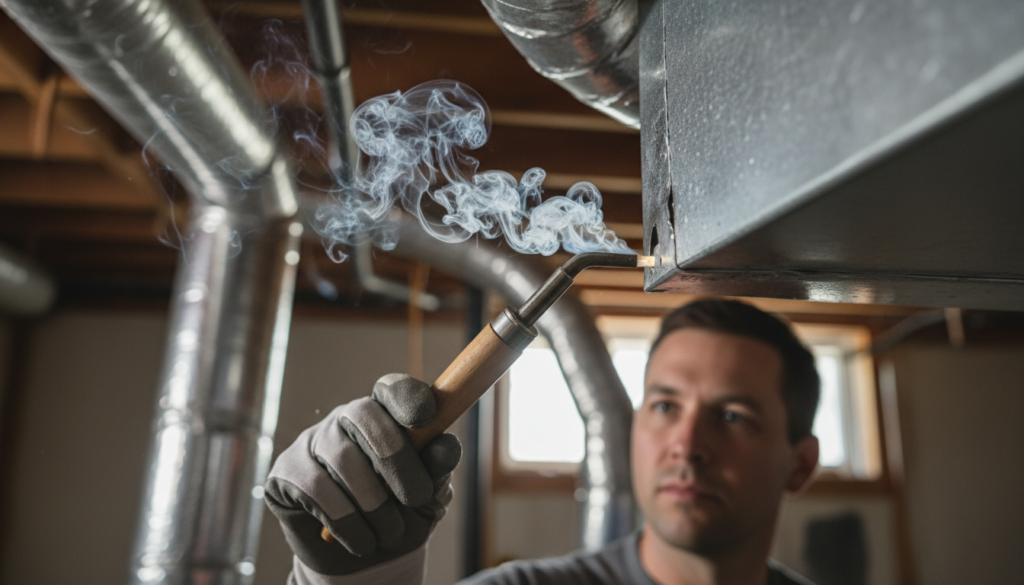
- Smoke Pen Test: Use a tool called a smoke pen or a handheld fogger (sometimes called a “Wizard Stick” alternative) . Hold the device near the joints. If the smoke is blown away from the joint, air is escaping . If the smoke is sucked into the joint, the duct is pulling contaminated air in . Both scenarios show a leak .
Professional Diagnostics
While DIY checks are helpful for obvious leaks, a professional can measure exactly how much air you are losing . They use a specialized tool called a Duct Blaster .
A Duct Blaster is essentially a fan and gauge system that pressurizes the duct system and measures the air leakage . This pressure test gives a quantitative measurement, usually in CFM (cubic feet per minute), of how much air is leaking before you start sealing . This measurement is also important after you finish the job, so you can see your success . Getting a professional test often costs between $100 to $200 .
Surface Preparation (Do Not Skip This Step)
This step is critical, but it is often missed by people doing the work themselves.
You must remember that sealants and tapes must stick well to a clean, dry surface . If you apply mastic or tape over dust, dirt, or grease, the sealant will eventually peel right off, and the leak will return .
Before you seal anything, you must wipe away all dirt, dust, and grease with a clean cloth or a mild cleaning fluid . Make absolutely sure the area is completely dry before you start applying any sealant or tape .
The Three Proven Sealing Solutions (Techniques and Materials)
There are three main ways to seal ductwork, depending on whether you are doing the job yourself or hiring a professional, and whether the ducts are easily reachable.
Solution 1: Mastic Duct Sealant (The Best DIY Option)
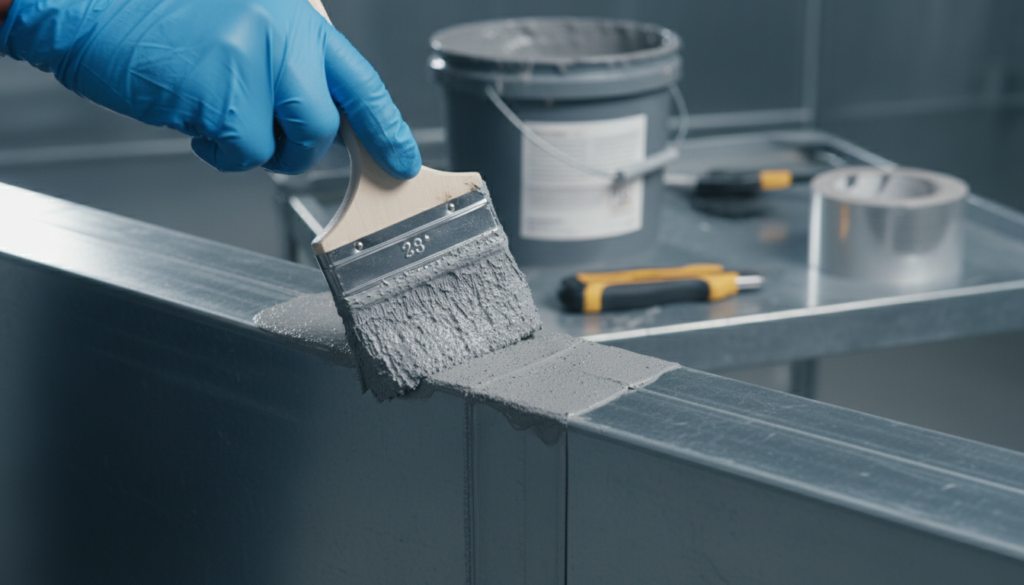
For ducts you can easily reach, mastic is the best choice for a long-lasting fix .
- Material: Mastic is a thick, flexible, water-based paste that feels like putty . It is sometimes called “duct butter” . High-quality mastic often contains fiberglass fibers to add strength .
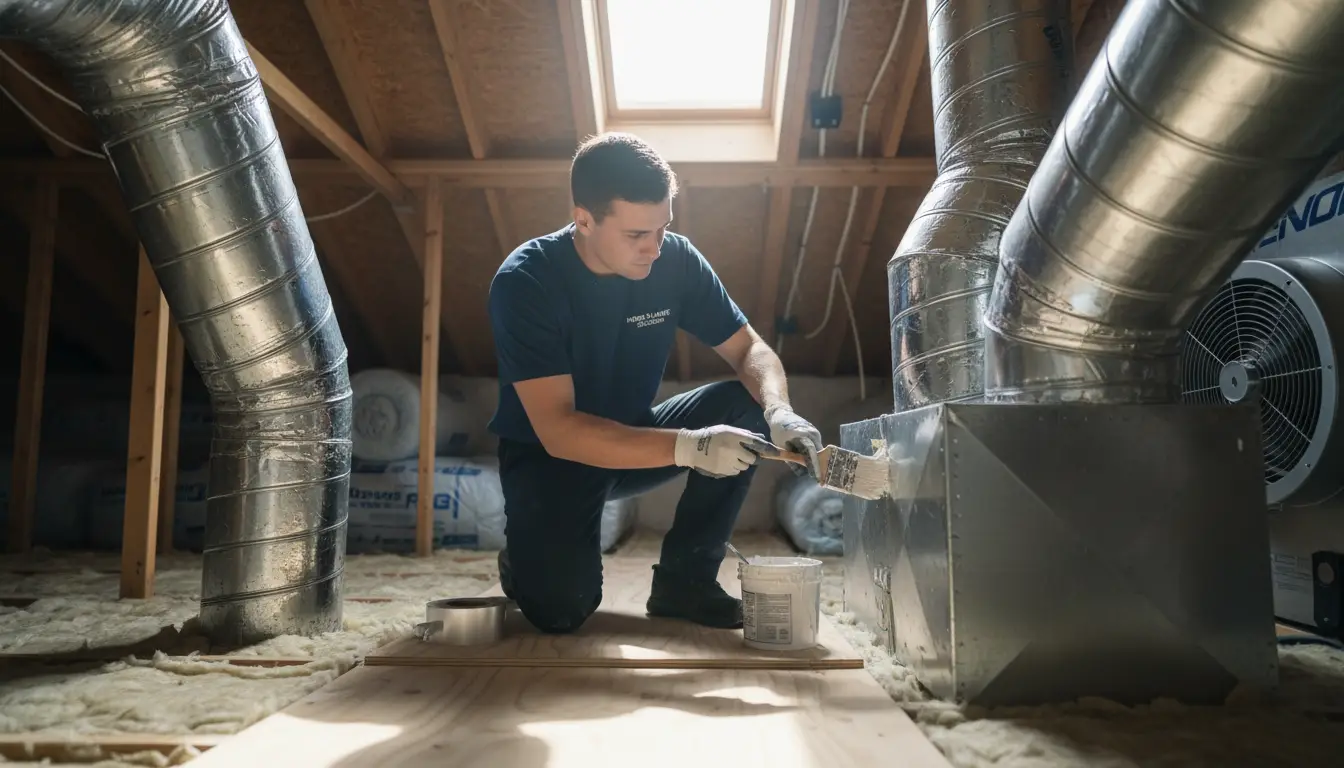
- Application: Mastic is easy to apply. You can use a stiff paintbrush, a caulking gun, or even a gloved hand . You must apply the mastic generously over all joints and seams . The layer should be about the thickness of a nickel to ensure a strong, airtight barrier .
- Durability: Once it dries, mastic forms a permanent, very strong seal . It is known to last for 10 to 20 years .
- Safety Precaution (Drying Time): Since mastic is water-based, you should wear gloves and a mask when applying it, especially if you are working in a poorly ventilated area . Note that water-based mastic sealants are not instantly dry. They require 24 to 48 hours to fully cure or dry before you should run your heating or cooling system at full power .
Solution 2: HVAC-Rated Tape (The Quick Patch/Reinforcement)
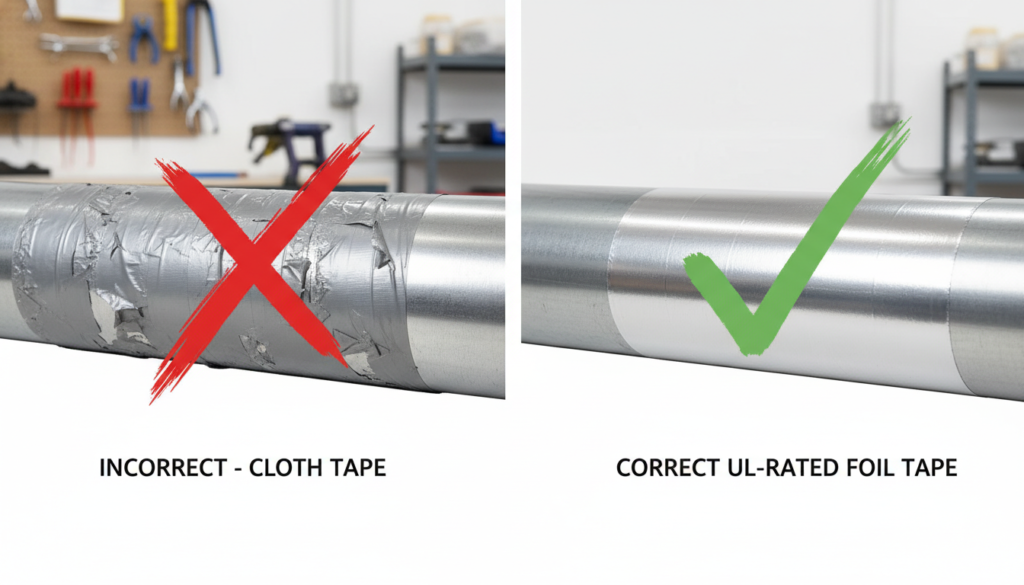
Tape can be used for smaller leaks, but you must choose the right product.
- Critical Warning: Never use conventional cloth duct tape . Standard “duct tape” is ineffective for HVAC systems. It is not fire-rated, and the adhesive breaks down quickly when exposed to the temperature changes inside and outside the ductwork, causing it to peel off .
- Approved Materials: The only tapes you should use are metallic, foil, or butyl tapes that are clearly labeled with the Underwriters Laboratories (UL) emblem . The UL mark means the tape has been tested and approved for safe use in heating and cooling systems .
- Best Use: Use approved tape for sealing minor, isolated leaks . For the strongest fix, use the tape as a reinforcement first, and then cover it completely with mastic .
Solution 3: Aeroseal (The Professional, Whole-System Fix)
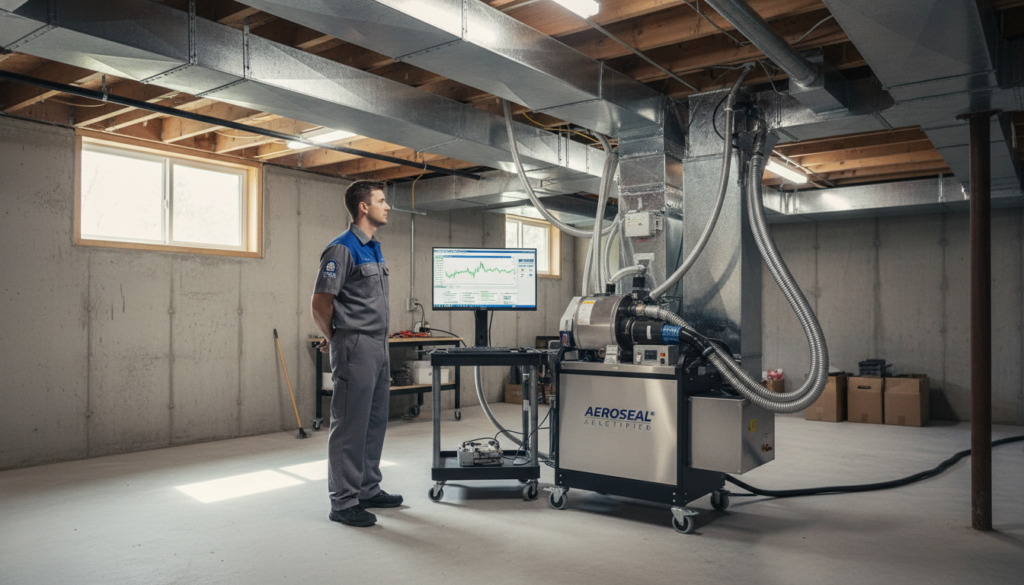
For leaks hidden inside walls or ceilings, you need a professional solution called Aeroseal.
- Mechanism: Aeroseal is an advanced system used by certified technicians . The technician isolates the duct system, pressurizes it, and then injects a non-toxic, aerosolized sealant directly into the ducts . The liquid sealant travels through the air until it finds the leak holes, where it sticks and builds up to seal the gap .
- Primary Benefit: This system is best for sealing leaks in inaccessible areas that are hidden behind drywall, ceilings, or embedded in concrete . Manual methods cannot fix these kinds of leaks .
- Effectiveness: Aeroseal is extremely powerful, proven to seal up to 95% of duct leaks . It comes with a 10-year warranty and is known to last for more than 20 years .
Advanced Sealing: Handling Complex Ducts and Major Damage
Ductwork comes in different forms, and sometimes leaks are too big for simple paste or tape. You need special techniques for certain situations.
Sealing Flexible Ducts (Flex Duct)
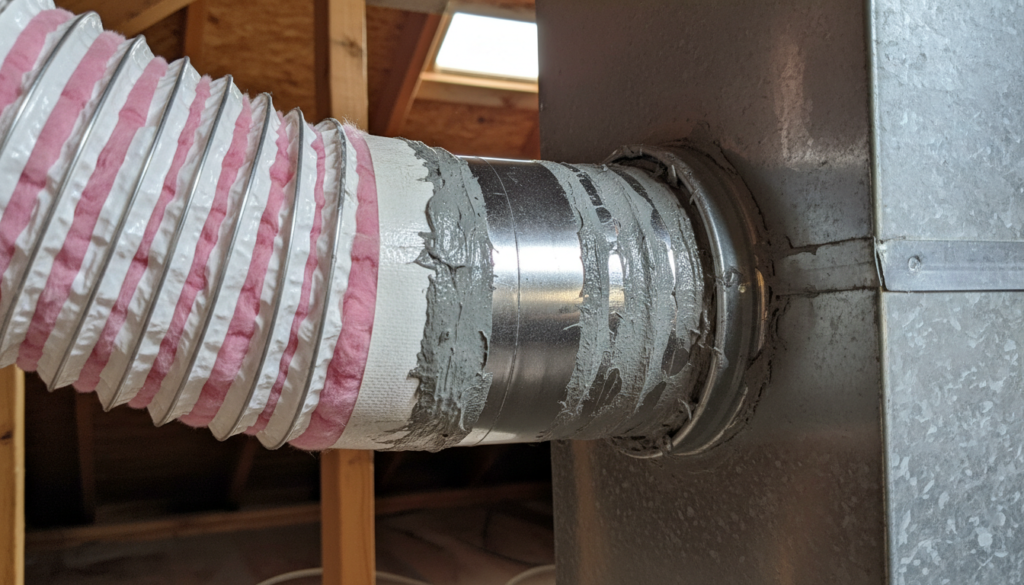
Flexible ducts (often called flex duct) are common but are easily damaged. They are vulnerable to kinking or punctures .
The most important place to seal is the connection point where the flexible tube meets the metal collar of the main duct run .
- Method Detail: Flex ducts have three layers: an inner core, insulation, and an outer jacket (vapor barrier). You must seal all three layers properly at the connection . Use strong, UL-rated tape and/or mastic to secure the inner core and the outer jacket to the metal collar . This process maintains the system’s structural integrity and prevents water vapor from getting into the insulation, which can cause condensation .
Repairing Severe Holes and Gaping Voids
Sometimes, a leak is not a small crack but a large hole caused by rust or damage.
If a hole is larger than 1/4 inch, mastic sealant alone will not work to close the gap . The sealant needs something solid to stick to and hold it in place.
- Patching Technique: For large holes, you must apply a patch first to create a rigid surface . You can use foil tape or fiberglass mesh to cover the gap and provide a solid backing . After you apply the patch, you must coat the patch completely with a thick, even layer of mastic . This two-step process ensures durability and creates a truly airtight seal.
Sealing Duct Board and Spray Foam
Some duct systems are made of fiberglass material called duct boards instead of metal. These materials also need proper sealing at the joints.
- Spray Foam Use: You can use specialized spray foam sealant to fill small cracks and gaps . This is especially effective around flexible duct junctions where they enter a wall or ceiling . Since spray foam also provides insulation, it offers double protection . However, you must make sure the foam is specifically designed for HVAC use to guarantee it is non-flammable and not toxic .
Deciding Between DIY and Professional Service
Your budget and the location of your ducts will help you decide if you should seal your ducts yourself or hire a pro.
DIY Applicability
- When to Do It Yourself: Sealing is a good DIY project if your ductwork is fully accessible . This means the ducts are located in an unfinished basement or an attic that is easy to reach .
- Cost: DIY materials are generally very affordable, typically costing only $50 to $200 .
- Drawback: The main disadvantage is that the job is labor-intensive . More importantly, you will miss all the leaks that are hidden inside walls or ceiling cavities .
Professional Applicability and Cost
- When to Call a Professional: You should call a professional if your home has a complex system, if the ductwork runs in inaccessible areas (inside walls), or if you want the comprehensive sealing results that Aeroseal offers .
- Professional Costs: If you hire a professional to manually seal accessible ducts, the cost usually ranges from $500 to $1,500 .
- Aeroseal Investment: Aeroseal installation is a significant investment because it is advanced technology. The cost usually falls between $2,000 and $5,000 .
Serving Lafayette, LA and surrounding areas, Fontenot’s Air Conditioning and Heating provides expert duct sealing services with guaranteed results. Schedule your consultation today.
Clarifying the “Intentional Leakage” Debate
Sometimes, people who are not experts suggest that air ducts need to leak a little bit for the system to work right. This idea is sometimes called “intentional leakage.”
- Expert Consensus: While complex technical calculations exist for commercial buildings, the consensus among professionals following ASHRAE standards is that typical home HVAC systems are not designed to rely on air leakage to work properly .
- The Bottom Line: Leaks are always harmful . When air leaks into unconditioned spaces (like a cold attic), it wastes money, stresses your equipment, and lowers your indoor air quality . The clear goal is to maximize the containment of conditioned air inside your ductwork .
Finalizing the Project (Insulation and System Optimization)
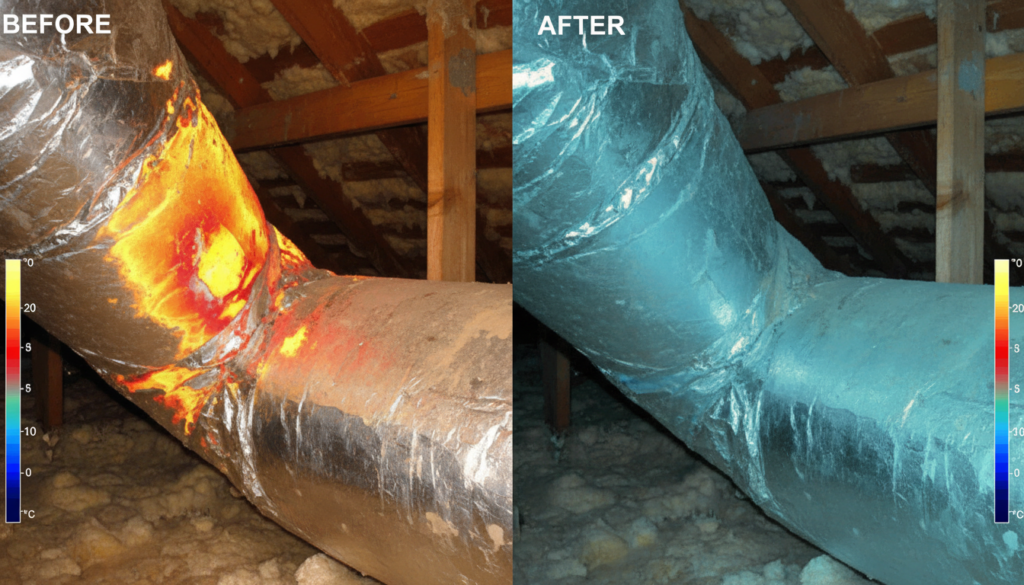
Once you have sealed all the leaks, you are almost done. The final steps involve verifying your work and preparing your system for the changes you just made.
System Post-Testing
After all the mastic has dried and you believe the sealing job is complete, it is important to check your work .
You can conduct a final leak test or a post-sealing evaluation . This usually involves running the Duct Blaster test again to measure the exact amount of air reduction (in CFM) you achieved . This test verifies that your effort was successful .
The Critical Step After Sealing: System Re-Balancing
This step is often forgotten but is very important for the life of your equipment.
- Insight: When you successfully seal 20% to 30% of the leaks, you dramatically increase the pressure inside the duct system. According to building science research this increased pressure, called static pressure, can put extra stress on the blower fan and the motor. If the pressure is too high, it can wear out the unit faster.
- Action: Because of this change, you should consult an HVAC professional after sealing. Certified HVAC professionals can measure the new static pressure inside the system.. Your system may need re-balancing, which means the professional might adjust the blower fan speed or change how much air the registers in the rooms let out. This ensures that the improved airflow is delivered correctly and prevents the unit from wearing out too soon.
Adding Duct Insulation
If your ductwork runs through unconditioned areas; like a hot attic, a cold garage, or a crawlspace, insulation is required to keep the air inside the duct at the temperature you want . Sealing the leaks must always be done first before you add insulation .
- R-Value: Insulation is measured by its ability to resist heat flow, which is called the R-value . For ducts in these spaces, the insulation should have a minimum R-value of R-5 .
- Application: Use appropriate insulation materials, like fiberglass or cotton duct insulation . Make sure the vapor barrier (usually the aluminum foil backing) faces outward . A vital tip is to avoid compressing the insulation . If you squeeze the insulation tightly, it significantly lowers its R-value, making it much less effective .
Conclusion: A Healthier, More Efficient Home
Sealing your ductwork is an essential task that provides huge payoffs . By sealing those unseen gaps, you are not just plugging holes; you are directly improving your home’s comfort, enhancing the quality of the air you breathe, and locking in significant long-term savings on your energy bills.
Whether you choose to use the permanent durability of mastic for an accessible DIY project, or you hire a professional for the comprehensive coverage of an advanced solution like Aeroseal, investing time and resources in duct sealing today is an investment in the longevity of your HVAC system and a healthier living environment for your family .
Need professional duct sealing services in Lafayette, LA? Fontenot’s Air Conditioning and Heating offers expert duct diagnostics, sealing, and system optimization. Contact us today for a comprehensive evaluation and start saving on your energy bills!